
For Montreal lab managers, achieving CNESST compliance is not about a simple checklist; it’s about building a proactive, audit-proof operational culture that anticipates regulatory scrutiny.
- Failure in fundamental areas like waste segregation or sharps disposal carries severe penalties, including permit suspension.
- Robust, bilingual documentation and rigorously followed protocols are your primary defense during an unannounced inspection.
Recommendation: Shift from a reactive compliance mindset to a proactive risk management system where every procedure is documented and defensible.
As a laboratory manager in Montreal’s thriving biotech hub, the pressure is immense. You are not just driving scientific innovation; you are the custodian of safety and the gatekeeper of regulatory compliance. The challenge lies in navigating a complex web of overlapping jurisdictions: the provincial authority of the Commission des normes, de l’équité, de la santé et de la sécurité du travail (CNESST), federal mandates like the Human Pathogens and Toxins Act (HPTA), and Quebec’s unique linguistic requirements. It’s easy to fall into the trap of a “checklist compliance” mindset, believing that as long as boxes are ticked, the lab is safe and secure.
Many facilities operate under the assumption that having personal protective equipment (PPE) available and providing basic training is sufficient. They might have procedures for waste disposal and spill response written down in a binder somewhere. But if the fundamental key to impenetrable biosafety wasn’t merely following rules, but embedding a deep, operational understanding of *why* those rules exist? What if the secret to passing a surprise CNESST audit lay not in a last-minute scramble, but in a continuously maintained state of “audit-readiness”?
This guide abandons generic advice. Instead, it adopts the rigorous perspective of a biosafety officer, focusing on the critical control points that CNESST inspectors scrutinize. We will dissect eight distinct operational areas, moving beyond the ‘what’ to explain the ‘how’ and ‘why’ of building a resilient, defensible biosafety program. This is your framework for transforming your laboratory’s safety protocols from a reactive necessity into a proactive, cultural asset that protects your people, your research, and your permit to operate.
To navigate this complex but critical subject, we will address the most pressing questions lab managers face. The following sections are structured to provide clear, actionable answers and build a comprehensive understanding of your obligations and best practices within the specific regulatory landscape of Montreal.
Summary: A Manager’s Guide to CNESST Biorisk Compliance in Montreal
- Why Mixing Biomedical Waste with Regular Trash Can Cost You Your Permit?
- How to Use a Biohazard Spill Kit Correctly Without Spreading Contamination?
- Biosafety Cabinet Class II A2 or B2:Which Structural Safeguards Are Mandatory for Commercial Buildings in Quebec?
- The Sharps Disposal Mistake That Causes 80% of Lab Accidents
- When to Validate Your Autoclave: A Testing Schedule for Compliance?
- How to Store Acids and Bases to Prevent an Explosion in Your Waste Room?
- How to Choose Thermal Gloves That Still Allow Fine Motor Control?
- How to Prepare Your Montreal Business for Unexpected Regulatory Audits?
Why Mixing Biomedical Waste with Regular Trash Can Cost You Your Permit?
In the eyes of the CNESST and Quebec’s Ministry of the Environment, Climate Change and Wildlife (MELCC), the line between biomedical waste and regular trash is absolute. The most common and costly violation is not a complex procedural error but a simple act of improper segregation. Placing a contaminated pipette tip or a used culture plate in a common garbage bin is not just a minor mistake; it’s a fundamental breach of protocol that can trigger fines, mandatory retraining orders, and in severe or repeated cases, the suspension of your operational permits. The core issue is chain of custody. Once biomedical waste is mixed with municipal solid waste, it contaminates the entire stream, posing a risk to sanitation workers and the public, and violating the very foundation of Quebec’s Regulation respecting biomedical waste.
The financial and reputational costs of a single violation far outweigh the investment in a robust segregation system. A near-violation can serve as a powerful catalyst for improvement.
Case Study: Montreal Laboratory Waste Management Compliance Challenge
A Montreal-based research facility narrowly avoided permit suspension by implementing a comprehensive waste segregation system after an incident of cross-contamination was discovered. By partnering with specialized chemical waste management services, they established clear, auditable sorting protocols for recycling, recovery, and safe disposal. This demonstrates that professional partnerships are a critical component of maintaining CNESST compliance and protecting the facility’s right to operate.
To prevent this, lab managers must move beyond passive reminders and implement an active auditing process. This ensures that the established protocols are not just written down but are consistently followed. A pre-emptive internal audit is your best defense against an inspector’s findings.
Action Plan: Waste Stream Audit Before a CNESST Inspection
- Conduct visual inspections of all waste collection points to identify any visible mixing of biomedical and regular waste.
- Review color-coded bin placement and verify proper, compliant labeling in both French and English as required by Quebec regulations.
- Document waste segregation training records for all staff who have handled biological materials within the last 12 months.
- Verify chain of custody documentation for biomedical waste disposal contracts with licensed Montreal-area haulers.
- Create photographic evidence of compliant waste separation practices for immediate presentation during an inspection.
Ultimately, a perfect record in waste management is a clear signal to regulators that your lab operates with a high degree of professionalism and a serious commitment to safety culture.
How to Use a Biohazard Spill Kit Correctly Without Spreading Contamination?
A biohazard spill transforms a controlled laboratory environment into a zone of active risk. The immediate actions taken are critical; improper technique can aerosolize pathogens, spread contamination, and increase personnel exposure. The most common error is a panicked, haphazard cleanup. Effective response is not about speed, but about methodical containment. The primary goal is to prevent the spill from getting larger. This means working from the outside of the spill toward the center, a technique that contains the material rather than pushing it outwards.
During cleanup, clear and immediate communication is a regulatory requirement. In Montreal, this means using bilingual warnings to alert all personnel. As per Quebec’s language laws, any signage or verbal warning must be in French and English, with French given precedence, to ensure universal understanding in a diverse workforce. A calm, drilled response in the first minute is more effective than a rushed, chaotic one.
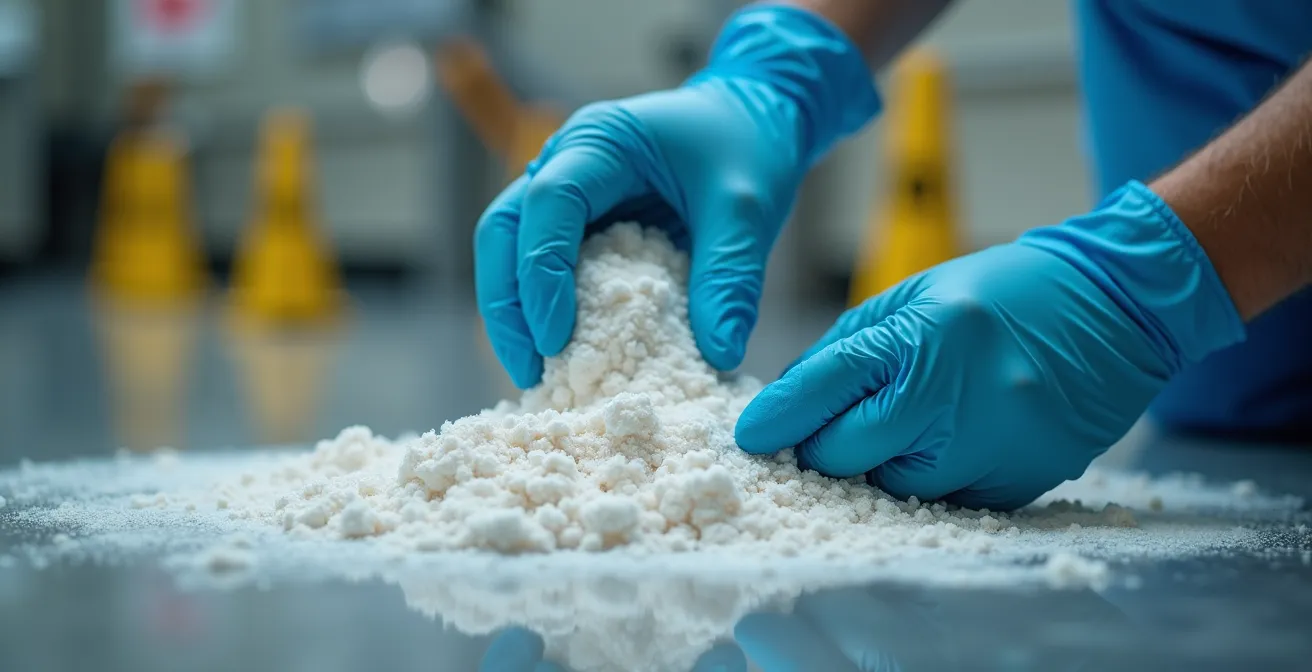
The image above illustrates the correct technique: gloved hands applying absorbent material from the perimeter inwards. This methodical approach is the cornerstone of effective spill management. Once the spill is physically contained, the focus shifts to documentation and disposal. According to Canadian biosafety standards, all spill incidents must be formally documented on incident report forms. Furthermore, all used spill kit materials are now considered biomedical waste and must be disposed of according to Quebec’s specific regulations, using licensed waste management services. This creates an unbroken, auditable trail from incident to disposal.
- 0-10 seconds: Alert nearby personnel using a loud, clear, and bilingual warning: “DANGER! SPILL! / DANGER! DÉVERSEMENT!”
- 10-20 seconds: Don appropriate PPE, starting with gloves, then a lab coat, and finally face and eye protection.
- 20-30 seconds: Establish a perimeter around the spill using warning cones or barrier tape from the kit.
- 30-45 seconds: Gently apply absorbent material, beginning at the outside edge and working methodically toward the center. Do not pour directly into the middle.
- 45-60 seconds: Once the absorbent is applied, allow the recommended contact time for the disinfectant, begin documenting the time of the incident, and notify the designated Biosafety Officer.
A well-executed spill response not only mitigates the immediate hazard but also demonstrates a high level of operational control and preparedness to regulatory bodies.
Biosafety Cabinet Class II A2 or B2: Which Structural Safeguards Are Mandatory for Commercial Buildings in Quebec?
Choosing between a Class II Type A2 and a Type B2 biosafety cabinet (BSC) is not merely a matter of procedural preference; it’s a major engineering decision with significant implications for your building’s infrastructure, especially in Quebec. The primary difference lies in air exhaust. An A2 cabinet recirculates approximately 70% of the air within the cabinet and can be ducted to the building’s exhaust or back into the room. A B2 cabinet, however, is hard-ducted and exhausts 100% of the air to the outside, offering no recirculation. This makes it ideal for work with volatile toxic chemicals and radionuclides.
The mandatory structural safeguard in Quebec is tied to the risk assessment of the materials being handled. If your work involves significant amounts of volatile chemicals in addition to biological agents, a B2 cabinet is often required. This choice imposes a critical structural demand: the building must have a dedicated, independent exhaust system capable of handling the cabinet’s full airflow. Integrating this into an existing commercial building in Montreal can require extensive and costly HVAC modifications, including dedicated ductwork to the roof and a separate exhaust fan. Failure to provide this dedicated exhaust for a B2 cabinet renders it non-compliant and unsafe.
However, the most sophisticated structural safeguard is useless without a competent operator. The ultimate safeguard is the user’s expertise. Regulatory bodies and institutions recognize this, placing heavy emphasis on mandatory training. For instance, McGill University’s biosafety training program mandates that an 80% passing grade is required on the BSC course, with certification only valid for three years. This underscores a critical principle: the cabinet is a tool, and the true safeguard is the trained professional using it correctly. An investment in a top-of-the-line B2 cabinet is wasted if the user doesn’t understand its airflow dynamics or alarm conditions.
Therefore, a lab manager’s decision must balance the scientific need for a B2 cabinet against the significant structural and financial commitment it requires, while ensuring a parallel investment in rigorous, documented operator training.
The Sharps Disposal Mistake That Causes 80% of Lab Accidents
The single most common and dangerous mistake in sharps disposal is not a complex error, but a simple one driven by convenience or inattention: overfilling the sharps container. An estimated 80% of needlestick injuries and other sharps-related accidents occur because personnel attempt to force one last item into a full container. This act can lead to needles protruding from the top, direct puncture wounds while forcing an item in, or injuries during the transport of an improperly closed container. This is a critical point of failure that CNESST inspectors actively look for.
The consequences of such an injury are severe. As the Canadian Centre for Occupational Health and Safety (CCOHS) highlights, the risks go far beyond a simple puncture.
The risk of HIV transmission from a contaminated needlestick is approximately 0.3%, while hepatitis B poses a 6-30% infection risk for unvaccinated individuals.
– Canadian Centre for Occupational Health and Safety, CCOHS Needlestick and Sharps Injuries Guidelines
Preventing these incidents requires a multi-layered approach, often visualized as a safety hierarchy. Relying solely on PPE (the bottom layer) is a failed strategy. A robust program builds safety from the top down.

This hierarchy consists of three critical layers. First, Engineering Controls are the most effective layer, involving the use of puncture-resistant, leak-proof containers and safety-engineered devices (e.g., self-sheathing needles). Second, Administrative Controls involve the procedures and policies you implement, such as a strict “do not fill past the line” rule, regular container replacement schedules, and comprehensive staff training. Finally, Personal Protective Equipment (PPE) like gloves provides the last line of defense but should never be the only one. A culture of safety prioritizes the engineering and administrative controls to minimize the very possibility of an accident.
For a lab manager in Montreal, ensuring an adequate supply of empty sharps containers and enforcing a zero-tolerance policy on overfilling is one of the most impactful and easily auditable safety measures you can implement.
When to Validate Your Autoclave: A Testing Schedule for Compliance?
An autoclave is the final checkpoint for decontaminating much of your lab’s biomedical waste. For the CNESST, an unvalidated autoclave is no better than no autoclave at all. “Validation” is not a one-time event but a continuous process of verification that proves your machine achieves a consistent and lethal sterilization level. Failure to provide a complete and up-to-date validation logbook during an audit is a major red flag that can call your entire decontamination process into question. Compliance requires a multi-tiered schedule of testing where each tier provides a different type of evidence.
The schedule must be documented and rigorously followed, creating an irrefutable record of performance. This includes daily checks, weekly biological tests, and periodic professional calibration. The combination of these tests provides a complete picture of the autoclave’s reliability.
Protocol for Failed Spore Tests
A failed biological indicator (spore test) is a critical failure. As emphasized in training materials from the Public Health Agency of Canada, facilities must have a documented protocol for this event. This procedure must include immediate quarantine of the failed load, an investigation into the cause, a mandatory re-testing of the machine, and formal reporting to the Biosafety Officer. Lacking this response plan is a significant compliance gap under the Human Pathogen and Toxins Act and Regulations.
A comprehensive validation schedule provides the necessary data to prove efficacy and ensure compliance. This is not just best practice; it is a regulatory expectation.
- Daily: A chemical indicator strip must be placed in every autoclave cycle. The color change, which confirms exposure to sterilizing temperatures, must be verified and recorded in a logbook for each run.
- Weekly: A biological indicator (BI) test using vials of Geobacillus stearothermophilus spores—highly resistant organisms—must be performed. A successful cycle will kill the spores, proving sterilization. The results (pass/fail) must be logged.
- Monthly: Review the temperature and pressure graphs or digital readouts for all cycles run during the month. Look for any anomalies or inconsistencies that could indicate a developing mechanical issue.
- Quarterly: Perform and document a preventive maintenance inspection. This includes checking the door seal for wear and tear, cleaning filters, and verifying that safety interlocks are functioning correctly.
- Annually: Schedule a full calibration and service by a certified technician. This service must be documented with certificates confirming the equipment is calibrated to NIST-traceable standards.
For a Montreal lab manager, this logbook is not just a record; it is your primary evidence to a CNESST inspector that you are fulfilling your due diligence in protecting your staff and the community.
How to Store Acids and Bases to Prevent an Explosion in Your Waste Room?
The chemical waste room is one of the highest-risk areas in any laboratory. The violent, exothermic reaction that occurs when strong acids and bases are mixed is a well-known hazard, capable of causing chemical burns, releasing toxic fumes, and even generating enough pressure to cause containers to explode. The primary control to prevent this is not sophisticated equipment, but a simple, unyielding policy of strict segregation. This principle extends from the lab bench to the final waste storage area. Incompatible chemicals must never share the same secondary containment bin, transport cart, or storage cabinet.
Quebec’s regulations on hazardous materials are explicit and enforced by environmental and workplace safety inspectors. A key rule is physical separation. According to Quebec’s Hazardous Materials Regulation, a minimum 1-meter segregation distance is required between incompatible chemical classes in a storage area, unless they are kept in separate, approved chemical storage cabinets. This is a simple, measurable rule that inspectors will verify with a tape measure. Compliance is not open to interpretation.
To simplify compliance, laboratories must use a clear chemical compatibility matrix, guided by the WHMIS/SIMDUT pictograms. This visual system should be posted prominently in all areas where chemicals are handled and stored, providing an instant reference for all personnel. Your team should not have to guess; the rules for segregation must be unavoidable.
| Chemical Type | Compatible Storage | Incompatible (Must Segregate) | WHMIS/SIMDUT Symbol |
|---|---|---|---|
| Strong Acids | Other acids, acid-compatible plastics | Bases, reactive metals, organics | Corrosive |
| Strong Bases | Other bases, base-compatible plastics | Acids, aluminum, zinc | Corrosive |
| Oxidizers | Separate oxidizer cabinet | Flammables, organics, reducers | Oxidizing |
| Flammables | Flammable cabinet, cool area | Oxidizers, heat sources | Flammable |
| Mixed Bio-Chemical Waste | Specialized dual-hazard containers | All other categories | Multiple hazards |
For a Montreal lab manager, enforcing these segregation rules through clear labeling, dedicated storage cabinets, and regular documented inspections is the only way to prevent a catastrophic and entirely avoidable incident.
How to Choose Thermal Gloves That Still Allow Fine Motor Control?
Working with cryogenic materials like liquid nitrogen (-196°C) or in -80°C freezers presents a difficult challenge for PPE selection: balancing thermal protection against the need for dexterity. Standard cryogenic gloves are bulky and thick, providing excellent protection against burns but making tasks that require fine motor control, like handling small vials or manipulating freezer racks, nearly impossible. This often leads to a dangerous behaviour: personnel removing their gloves for “just a second” to perform a quick task, exposing themselves to the risk of severe frostbite. The key is not to find a single “perfect” glove, but to implement a risk-based selection process.
The CNESST expects a documented hazard assessment for PPE selection. This means you must formally evaluate the task, the temperature, and the required dexterity, and then choose a glove that provides the appropriate balance. This may mean having different types of thermal gloves available for different tasks: a heavier, insulated gauntlet for gross handling and a thinner, more flexible cryo-glove for tasks requiring more precision. The choice must be deliberate and documented.
Administrative Control: The Two-Person Rule
Canadian biosafety guidelines recognize that even the best PPE can be defeated by human factors. For high-risk cryogenic work, they recommend administrative controls like the ‘two-person rule’. This policy requires a second trained individual to be present during procedures like retrieving samples from liquid nitrogen. This person acts as a safety observer, ensuring protocols are followed and can provide assistance, reducing the temptation for the primary worker to take risky shortcuts like removing their gloves.
The selection process should follow a structured framework to ensure the decision is defensible during an audit. The CNESST provides a framework for risk assessment that can be adapted for thermal PPE selection.
- Identify Hazard: Define the specific temperature hazard. Is it the ambient cold of a -80°C freezer or direct contact with liquid nitrogen at -196°C?
- Define Dexterity: What is the required level of fine motor control? Is the task gross handling of boxes or precise pipetting and vial manipulation?
- Select Rated Glove: Choose a glove with an appropriate ANSI/ISEA rating for both thermal protection and any secondary hazards like cut resistance.
- Document Rationale: Record the chosen glove model and the justification for its selection in your laboratory’s official PPE program documentation.
- Implement & Train: Create an inspection schedule for the gloves, establish clear criteria for when they must be replaced, and document all staff training on their proper use.
By documenting this thoughtful selection process, you demonstrate to the CNESST that you have moved beyond simply providing gloves to implementing a comprehensive safety system that accounts for both the hazard and the human factor.
Key Takeaways
- Segregation is Absolute: The line between waste streams is non-negotiable. Your primary defense is a rigorously enforced, color-coded segregation system.
- Documentation is Your Defense: In an audit, undocumented actions did not happen. From autoclave logs to training records, your paperwork is your proof of compliance.
- Culture Trumps Checklists: A proactive safety culture, where every team member understands the ‘why’ behind the rules, is more resilient than any reactive checklist.
How to Prepare Your Montreal Business for Unexpected Regulatory Audits?
The most effective way to prepare for an unexpected regulatory audit from the CNESST is to maintain a constant state of “audit-readiness.” An inspector’s visit should be treated as a routine event, not a crisis. This mindset is built on the understanding that compliance is not a project with a deadline, but a continuous operational state. Inspectors often form their initial impression of a facility within the first five minutes, focusing on fundamental, easily observable safety and compliance markers. A failing grade on these initial checks immediately signals to the inspector that a deeper, more rigorous investigation is warranted.
In Montreal, this initial scan has a crucial linguistic component. The inspector has the right to work in French, and your facility has an obligation to be prepared for this.
The inspector’s right to work in French and the lab’s obligation to have key documents bilingual and a designated French-speaking representative available.
– CNESST, Quebec Workplace Safety Regulations
This means key safety documents, labels (like WHMIS/SIMDUT), and emergency signage must be compliant. Your documentation should be organized in a binder, ready for immediate presentation, demonstrating professionalism and control. An organized, audit-ready binder is a powerful non-verbal signal of a well-managed program.

To cultivate this state of readiness, you can internalize the inspector’s initial checklist and perform regular, informal walkthroughs of your own facility. This simple, proactive habit can identify and correct the very issues that would attract negative attention during a real audit.
Mock CNESST Inspector’s First 5 Minutes Checklist
- Minute 1: Verify that all emergency exits are completely clear of obstruction and are marked with proper, illuminated bilingual signage.
- Minute 2: Check the accessibility and functionality of all eyewash stations and safety showers. Test one to ensure it provides a continuous 15-minute flush capability.
- Minute 3: Scan for valid WHMIS/SIMDUT labels on all chemical containers, both primary and secondary, ensuring they are present and legible in both French and English.
- Minute 4: Request the current training logs for key safety procedures (e.g., BSC use, autoclave operation) and verify that all relevant personnel have up-to-date certifications.
- Minute 5: Observe general housekeeping standards—are work areas tidy, is waste properly segregated, and is all required safety equipment present and in its designated place?
Begin by implementing this five-minute self-audit on a weekly basis. By making audit-readiness a routine, you transform the pressure of regulatory oversight into a catalyst for operational excellence.